Meet PoYo Workflows: connect AI models into repeatable creative workflows
Build reusable AI workflows in PoYo. Preview templates, connect image and video models, configure inputs and outputs, run in Playground and call your saved workflow through the API.
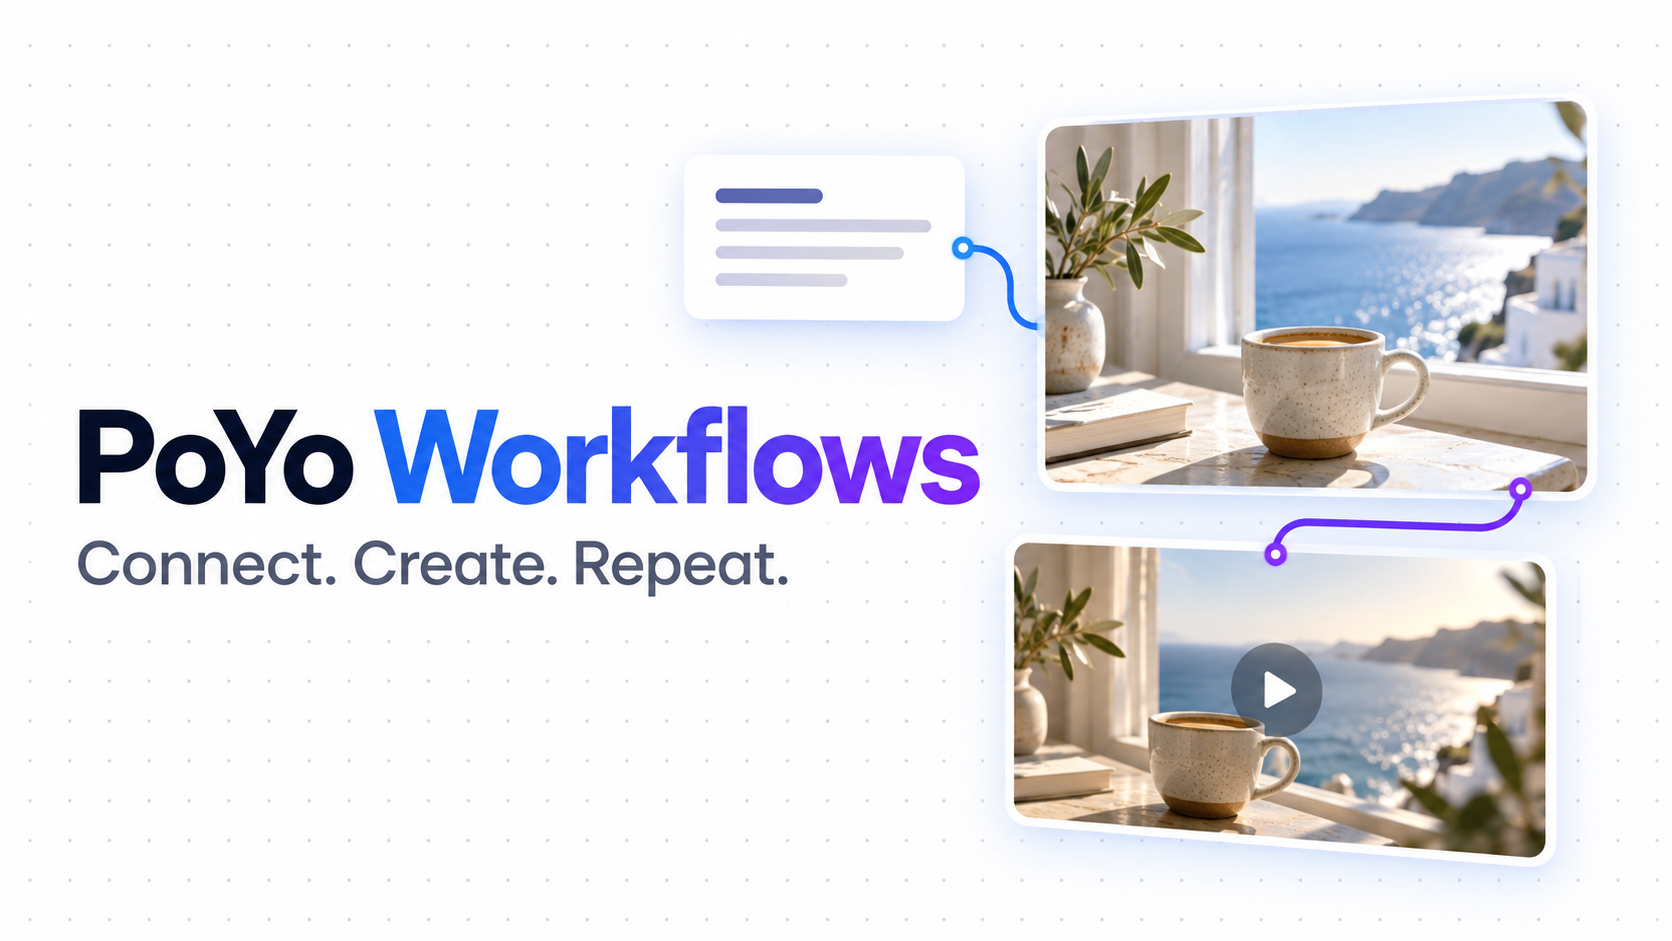
PoYo Workflows brings your creative steps onto one canvas. Choose the models, connect their inputs and outputs, and save a workflow you can run again with a new prompt or reference. Start with a template, or build your own sequence from a blank canvas.
A product photo can become a studio image, then a short showcase video. A scene description can become a still, then an animated shot. Once the connections are in place, the output of one step becomes the input of the next without downloading and uploading the file between those steps.
What’s new?
- Preview ready-made templates for image generation, editing, image-to-video and other creative tasks.
- Connect models on a visual canvas, including the inputs supplied at run time and the results your workflow returns.
- Save the setup and use Playground to run it with different prompts or media.
- Inspect run progress and individual node results, or try a single node when refining a step.
- Call the saved workflow through the API when you are ready to use it in an application.
The guide below follows the English interface. Our example creates a seaside coffee still and turns it into a five-second video. The screenshots show configuration, not a completed generation; the cover is an illustration.
1. Find a template for your task
Sign in and open PoYo Workflows. Your saved workflows appear in the list. Choose Templates to jump to the template library, where you can search by template or model name and filter by output type.
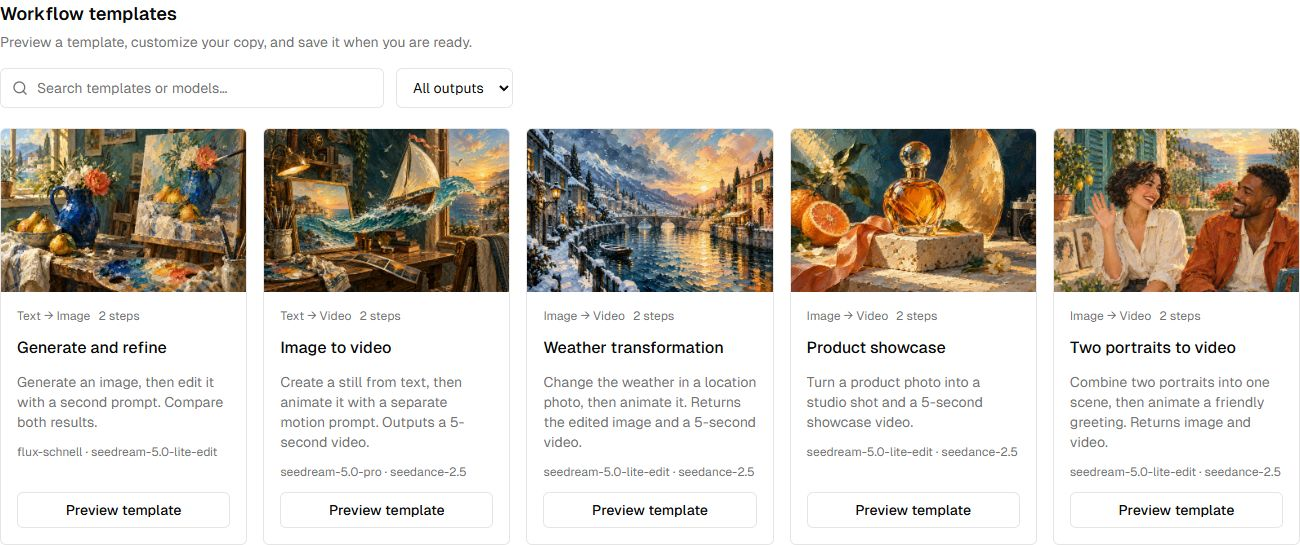
Figure 1. Each template card shows its input and output types, number of steps and models. Choose Preview template to inspect the setup.
Choose a starting point that matches the material you have:
| Template | Start with | What it does |
|---|---|---|
| Generate and refine | Two text prompts | Generate an image, then edit it |
| Image to video | A scene prompt and a motion prompt | Generate a still, then a five-second video |
| Product showcase | A product photo | Create a studio image and a short showcase video |
| Virtual try-on video | A person photo and a garment photo | Create a try-on image and a short fashion video |
For this walkthrough, select Preview template on Image to video. Despite its name, this template starts with text: the first model creates the image that the second model animates.
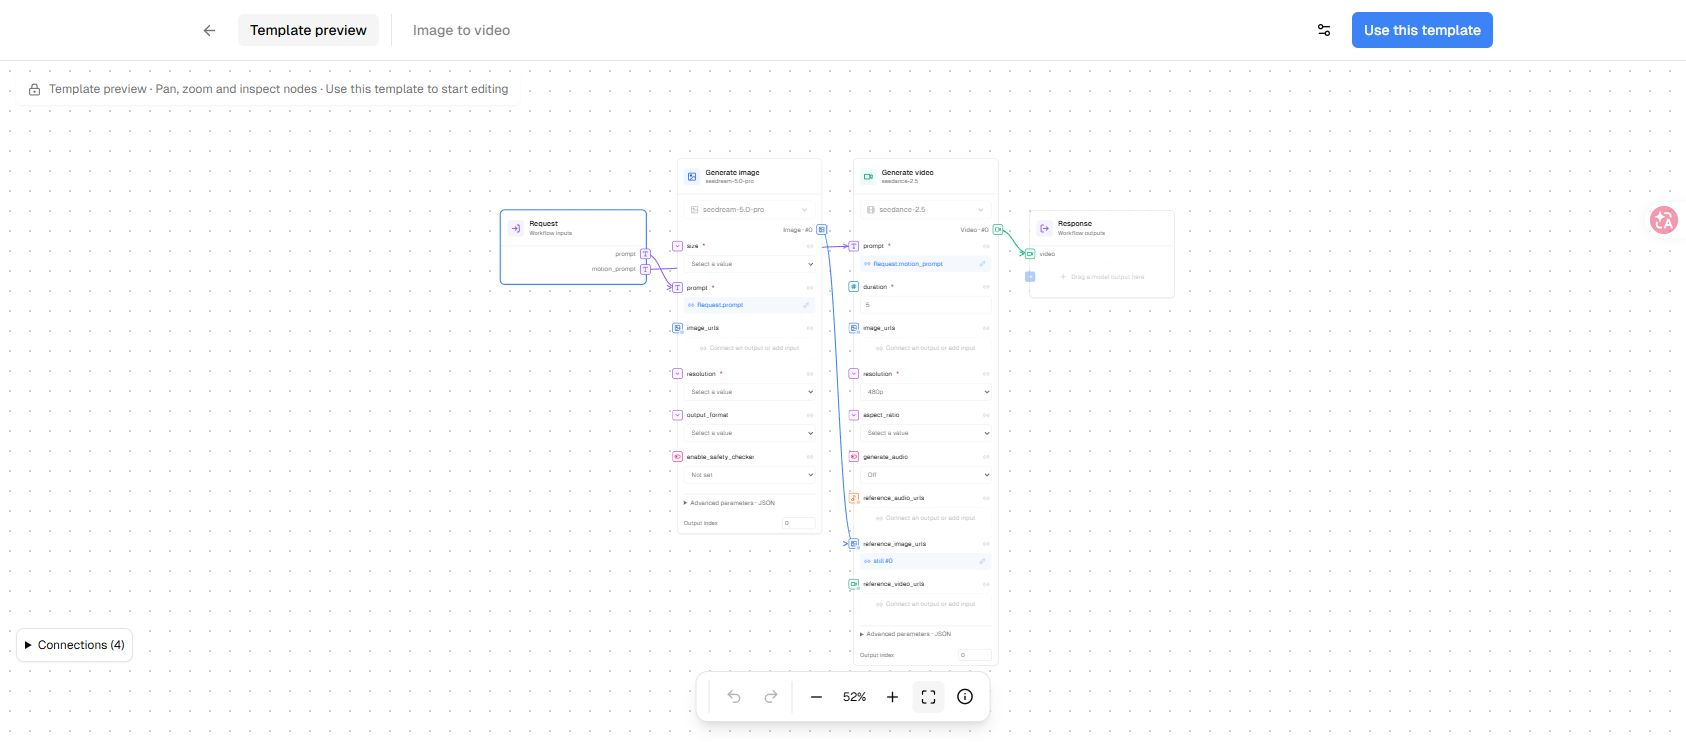
Figure 2. Template preview lets you pan, zoom and inspect the nodes before making an editable copy.
Choose Use this template to open a draft. Give it a recognizable name, such as “Seaside coffee video.” The draft is not in your saved workflow list until you choose Save. Leaving or refreshing the page discards unsaved draft edits. To start from scratch instead, choose New workflow on the Workflows page.
2. Choose models and connect the steps
The canvas has three main parts:
| Part | Purpose in this example |
|---|---|
| Request | Exposes prompt and motion_prompt for each run |
| Model nodes | Generate a still, then animate that still |
| Response | Defines the files returned by the workflow |
Select a node to inspect its settings. Set fixed values, such as image size and video duration, on the model node. Connect fields that should receive a Request value or an earlier node’s output.
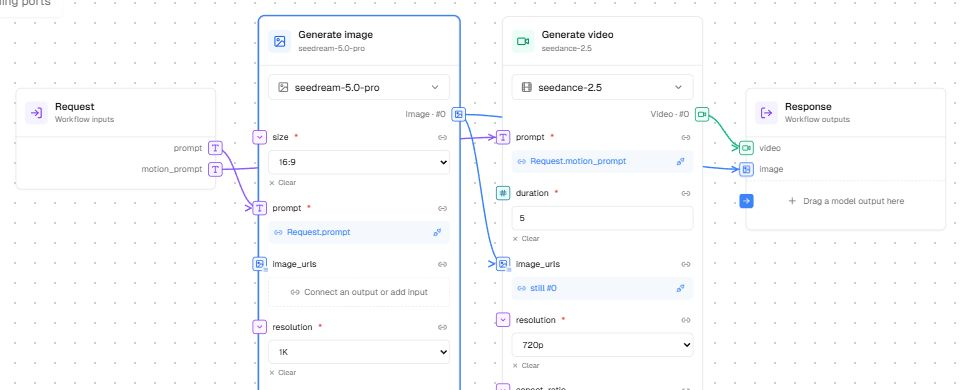
Figure 3. A reusable workflow separates the prompts that change each run from the model settings and connections you want to keep.
For the models shown here, set the image node’s size to 16:9 and resolution to 1K. Set the video node’s duration to 5 and resolution to 720p. Available fields and values depend on the selected model; check required fields marked with an asterisk.
In this example, the generated still should connect to the video node’s image_urls input. If your template copy connects it to reference_image_urls, disconnect that link and reconnect the still’s image output to image_urls before saving. Image-to-video and reference-media fields have different requirements.
You can drag an output port to a matching input, or click the output and then the input. Output indices start at 0, so Image · #0 means the first image. A single result and a list of results also need compatible connections. The canvas rejects incompatible connections and loops.
Change a model when the task needs it
Open the model selector inside a node. Browse by media type or search by name.
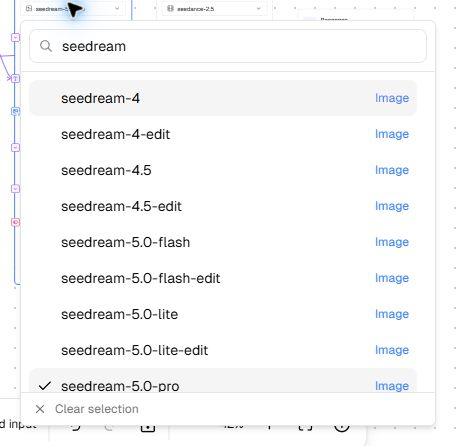
Figure 4. Search for a model within a node. The selected model determines that step’s parameters and supported media inputs.
If switching models would remove incompatible settings or connections, review the confirmation first. After switching, check the retained prompt, required values, incoming media and Response connections. Saving the graph alone does not verify that every step is ready to run.
Drag the canvas to pan, scroll to zoom, or use Fit to view for an overview. Undo, Redo and Lock editing help when arranging a larger workflow.
3. Define what changes each run and what comes back
Select Request, or choose a field such as prompt, to configure workflow inputs. Each field has a Field ID, Field type, optional Display name and Required setting.
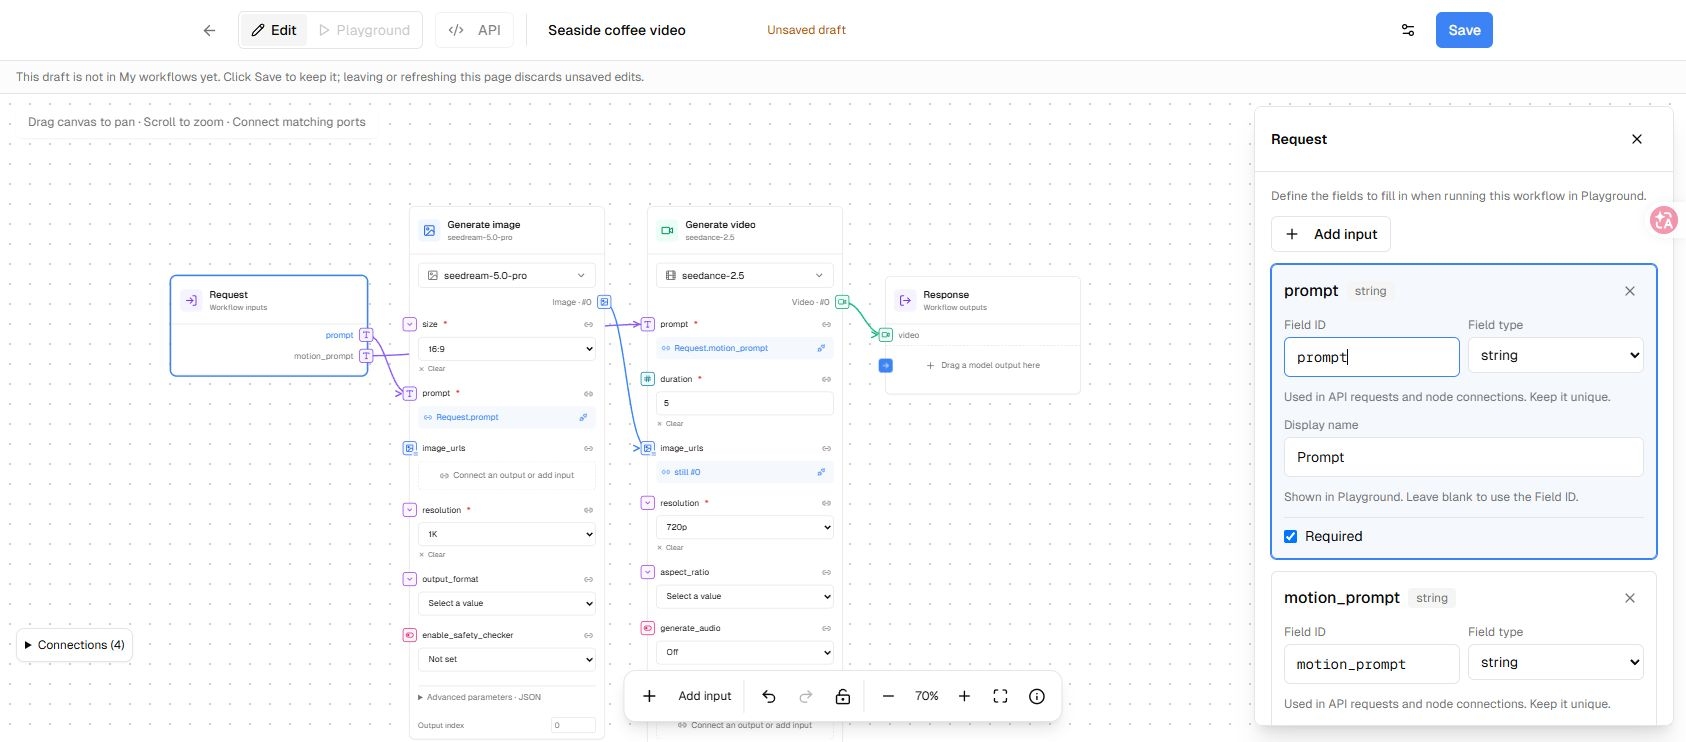
Figure 5. The Field ID is used by connections and API requests. The display name is the label people see in Playground.
Keep prompt and motion_prompt as text fields for our example. If you are building a photo-based workflow, add an image field or an image-list field and connect it to the appropriate model input. Playground provides upload controls for media fields. You can organize source material beforehand with PoYo Assets.
Next, select Response and decide what to return. The Image to video template returns a video by default. To return the generated still too, drag the image node’s output onto Response, or click that output and then Drag a model output here.
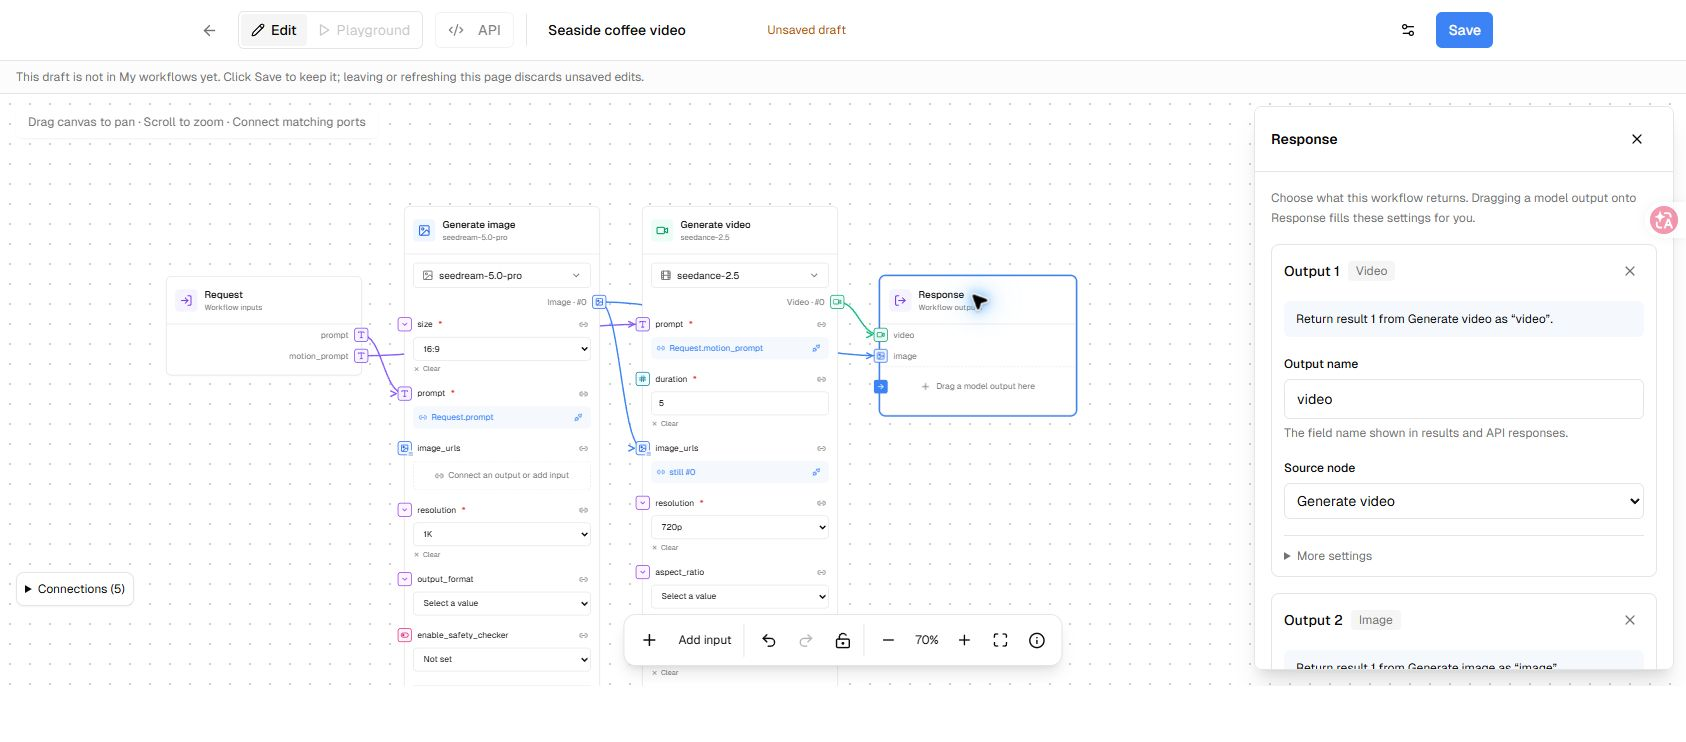
Figure 6. Connect both model outputs to Response to return the still and the video. Output names also become fields in API responses.
Check each output’s name, source node, result type and result index. Use Return as a list when the workflow should return the connected results as a list. A node can feed another step and also connect to Response, so the intermediate image can be part of your final deliverables.
Choose Save when the inputs, settings and connections are ready. Playground and API access become available after the workflow has been saved.
4. Run the workflow in Playground
Open Playground or choose Go to Playground. The input form is built from your Request fields. For this example, enter a scene description in Prompt:
A ceramic coffee cup on a wooden table beside an open seaside window at sunrise. Warm golden light, a calm blue sea in the background, natural product photography, horizontal 16:9 composition. No text or logos.
Then describe movement in Motion prompt:
Slowly push the camera toward the coffee cup. Add subtle steam rising from the cup and gentle movement on the distant sea. Keep the cup, table, lighting and composition consistent. One continuous shot, no cuts.
For templates with media inputs, choose Upload and wait for the files to finish uploading. Fill every required input before continuing.
Choose Estimate to check the available credit estimate. If the interface cannot determine an amount in advance, it will say that credits are determined when the workflow runs. Review the selected models and settings before choosing Run workflow.
A full run executes the connected workflow. In this example, the still is passed to the video step automatically; there is no manual image-review pause between those nodes. If you want to approve the still first, test the image node separately before starting a full run.
Running with unsaved changes saves those changes first. Each new run is billed for its generated tasks, including when you choose Run current workflow again.
5. Review results and refine one step at a time
Playground shows the selected run’s status, node progress and final outputs. Use Preview to inspect the returned media, or JSON to examine the response. Expand Node execution details to review a step’s inputs, status and outputs.
If a run fails without final outputs, completed nodes may still have results worth inspecting. Check those before deciding what to change. When looking at an older run, check its version: those results belong to that run, while the input form runs the current workflow definition.
For a targeted adjustment, select the node in Edit and open Node debug in its settings. Save & try node runs that node only; it does not run the upstream nodes or modify the original Run. If the node needs earlier outputs, select a Run from the same saved version and supply its required Request values in Playground.
Each node try is billed as an ordinary model task. If a submission cannot be confirmed, check generation history before starting another paid try. If Playground offers Recover previous submission, use it to resolve the earlier submission before starting a new run.
Download the outputs you want to keep while they are available. If a file has expired or is no longer available, the preview will indicate that. A saved workflow preserves the setup; check generated media separately in PoYo Assets.
6. Reuse your workflow in an application
Once the workflow is saved, open API to see cURL, JavaScript or Python examples. The examples use the saved version and the current Playground values, so save your edits and check the inputs first.
The basic pattern is:
- Submit the workflow version and inputs to
POST /v1/workflows/{id}/runs. - Keep the returned Run ID and query
GET /v1/workflows/{id}/runs/{run_id}for status and outputs. - Continue checking until the run reaches a terminal state, then handle the results or failure.
For media fields, an uploaded Playground file is represented by a PoYo-hosted HTTP(S) file_url. Replace any example placeholder URL with a publicly accessible media URL. Keep your API key in server-side configuration when integrating the workflow into an application.
You can return to the Workflows list to find a saved setup, rename it or copy its ID. Run it with a new prompt or photo when the structure still fits the next task.
Build the sequence you want to repeat
Start with two useful steps: create a still, then animate it. Set the model parameters, expose the prompts through Request, and connect the files you need to Response. After reviewing the first run, refine the step that needs work and keep the setup for the next brief.
If you prefer to describe a creative task in a conversation and let Agent plan the steps, see our PoYo Agent guide. Workflows gives you a canvas for defining and reusing those connections yourself.